
- Published on
How to automate the creation of your UI testing flows using Maestro Studio
- Authors
- Name
- Alex Styl
- @alexstyl


Maestro Studio is the latest addition to Maestro by mobile.dev. It is made to automate the creation of your UI test flows without the need to write a single line of code.
In this tutorial we will see how to install Maestro Studio on your machine, how to use it to automate the creation of your testing flows. Finally we will see how to export the created flows and how to run them to automate your UI testing.
How Maestro Studio looks like in action
Maestro Studio lets you create testing flows by interacting with your app. As soon as you perform an action (such as a tap or swipe) Maestro Studio will record that and add it to the list of actions.
You can then edit and export your flow into a .yml file which you can then run as many times as you like via Maestro.
The yml looks something like this:
# exported_flow.yaml
appId: <your-app-id>
---
- tapOn: 'Phone'
- tapOn: 'key pad'
- tapOn: '1,'
- tapOn: '1,'
- tapOn: '1,'
- assertVisible: '111'
How to install Maestro Studio on your local machine
Maestro Studio comes with the latest version of Maestro. You would need to either update your existing Maestro installation or install the latest version.
Update existing Maestro installation
Run the following command in your terminal:
curl -Ls "https://get.maestro.mobile.dev" | bash
❗️ If you previously installed Maestro via Homebrew use brew upgrade maestro to update it.
Install Maestro on your local machine
Run the following command in your terminal:
curl -Ls "https://get.maestro.mobile.dev" | bash
Automatically create your testing flows using Maestro Studio
Before you start creating your test flows, make sure to plug an Android device to your machine or have an emulator running.
Run maestro studio in your terminal to start Maestro Studio on your browser:

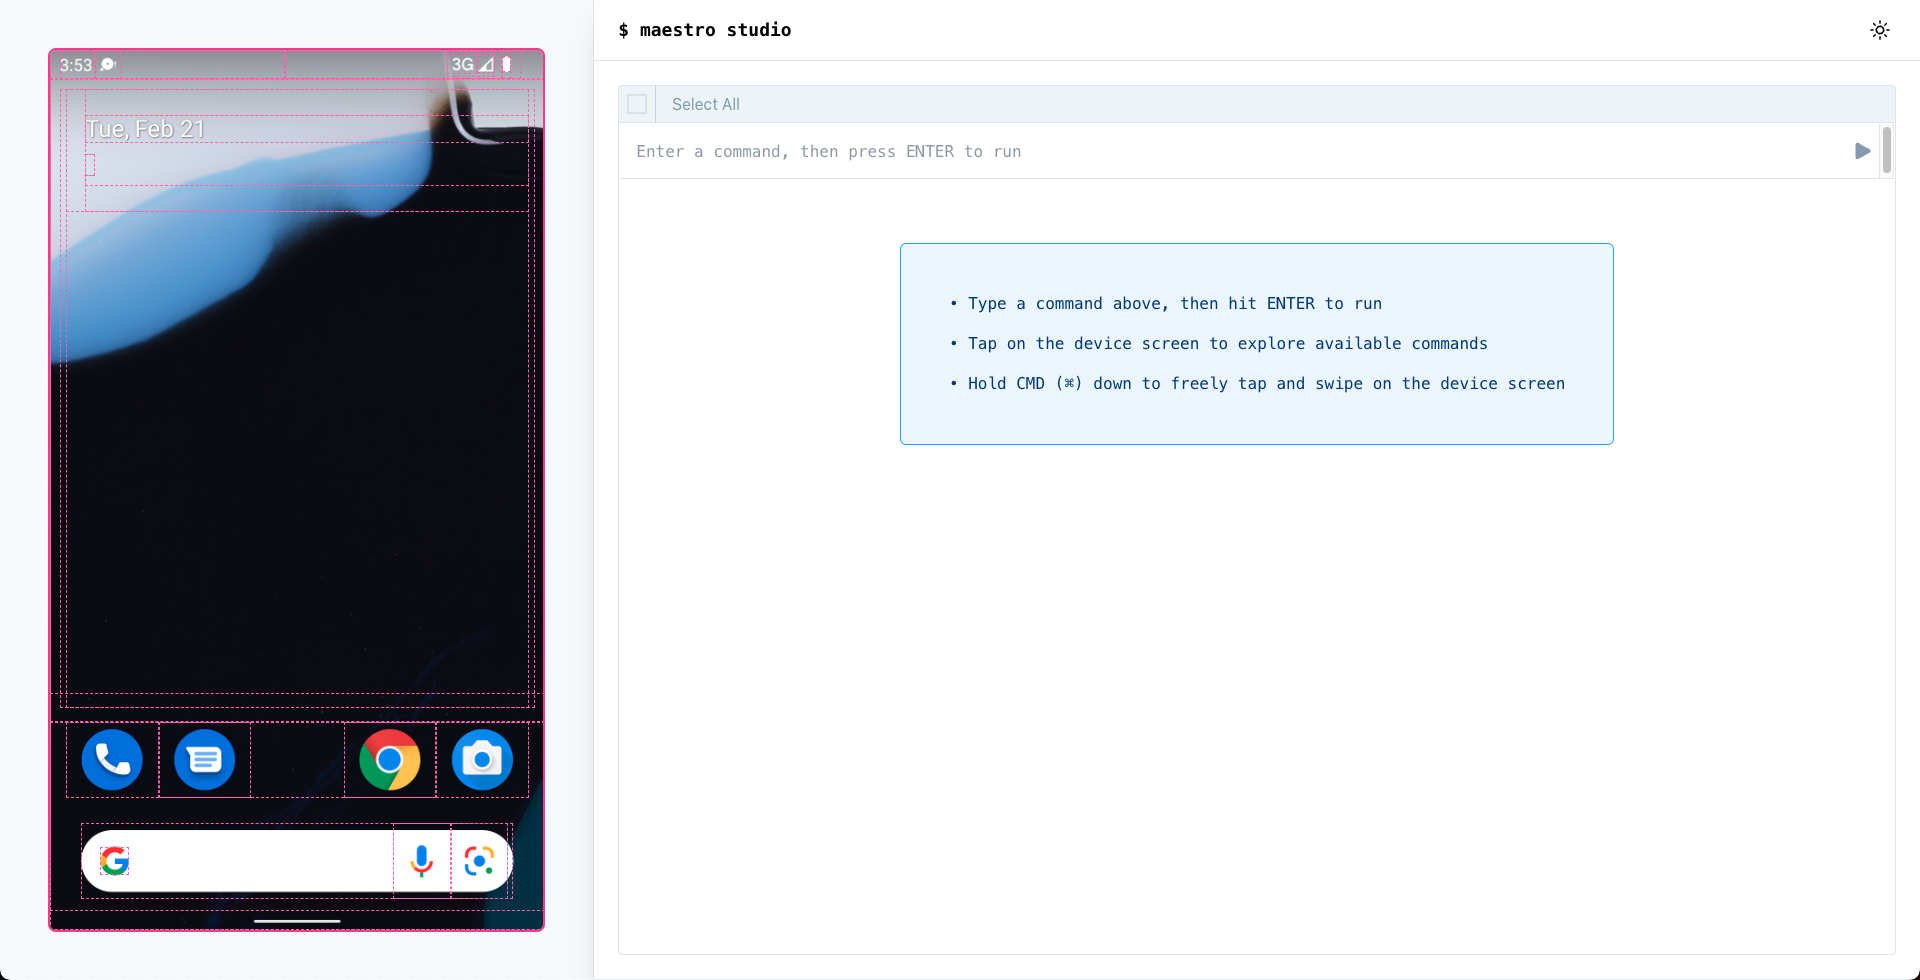
Once Maestro Studio is ready, start interacting with the device via the Maestro Studio. Each tap will be recorded and translated to an action which you can re-run while your test is executed.
What actions can I record via Maestro Studio
Currently, you can perform any visual gestures such as tapping on UI elements or swipes. Once you iteract with an element, Maestro Studio will bring up a list of available actions on that element such as tap, assert and conditional.

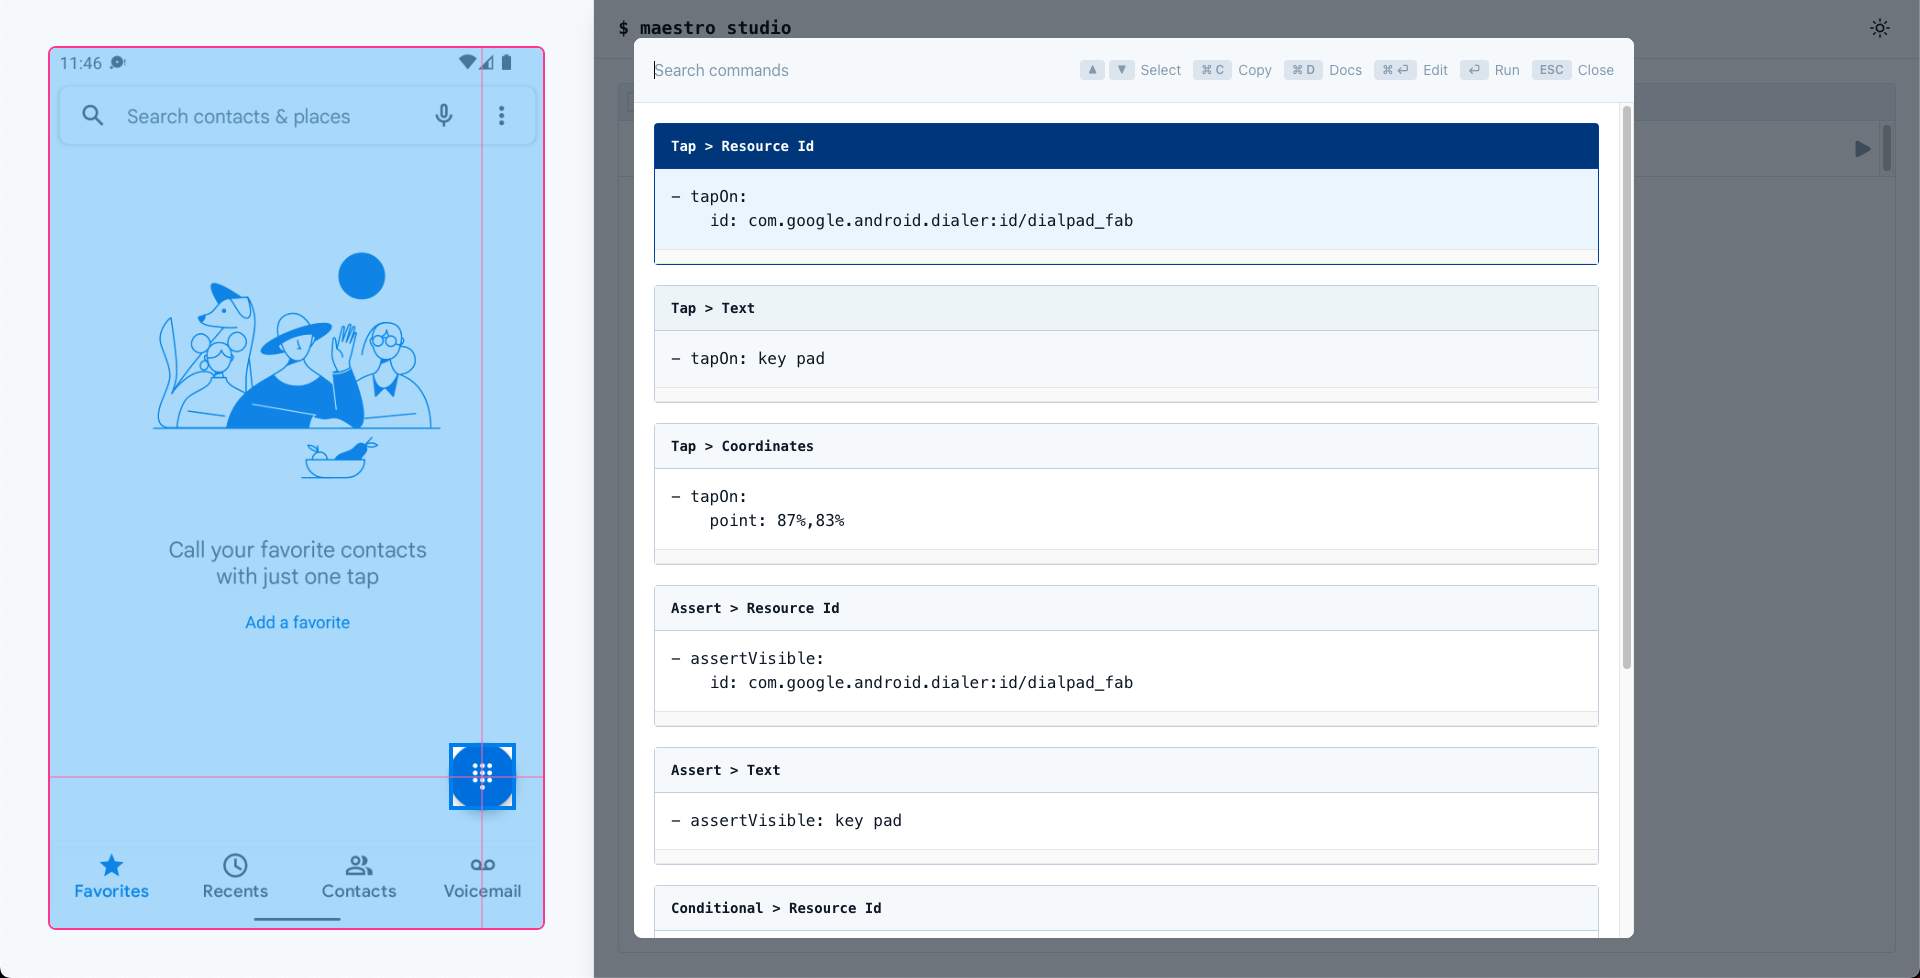
In order to record a gesture, press and hold CMD (⌘) on Mac while performing the gesture.
NOTE: Maestro has a much richer vocabulary than what Maestro Studio currently provides, such as long pressing, typing, pressing back and more. Learn about more available actions by clicking here.
How to export your test flow created by Maestro Studio
Once you are done creating your flow using Maestro Studio, you can export it and use it outside of Studio.
To export the flow, select all actions and click on the Export button.
At this point you should have 90% of the test flow done for you. You can now edit the exported recipe with actions that might not be present on Maestro Studio yet.
In this tutorial you learnt how to setup and use Maestro Studio in order to automate the creation of your UI testing flows. We saw how to start Maestro Studio and how each interaction on UI elements on the screen are automatically recorded for you. For more details around Maestro Studio make to check the full documentation and Github repository.
Related reading
Official Maestro Studio documentation on maestro.mobile.dev
How to automate your UI testing using Maestro on composables.co